Shirt stamping
DIY Shirt stamping
The people who are FulltimeMama.nl following for a while will have understood that my little man loves dinosaurs. The mania is now slightly less intense than a few months ago, but they remain his favorite 'animals'. So it was time for a real dinosaur shirt. Now I have bought him a nice shirt here and there.
The best thing is of course to make one yourself. So it happened; I started stamping a shirt.
DIY; Stamp your own shirt
Of course, this wasn't just any shirt. But it had to be a real T-rex. The monster among the dinosaurs.
This meant that I had to pull out my drawing skills and an ancient technique that I used to hate. Everything for your child, right?? 😉
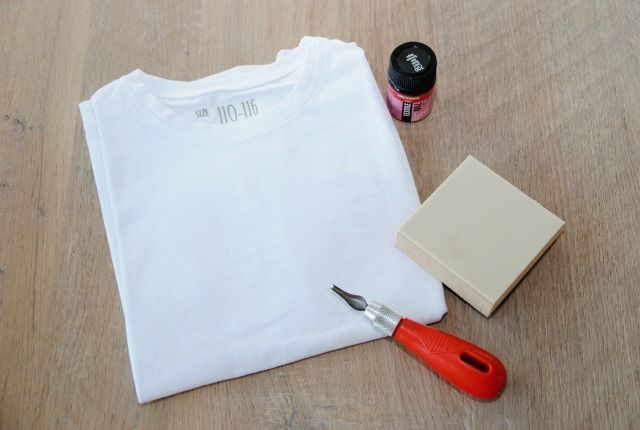
What do you need?
- A plain shirt in the right size
- Fabric paint
- Pencil
- An empty stamp pad
- A set of gouges
- Iron
- Brush or sponge
How do you proceed?
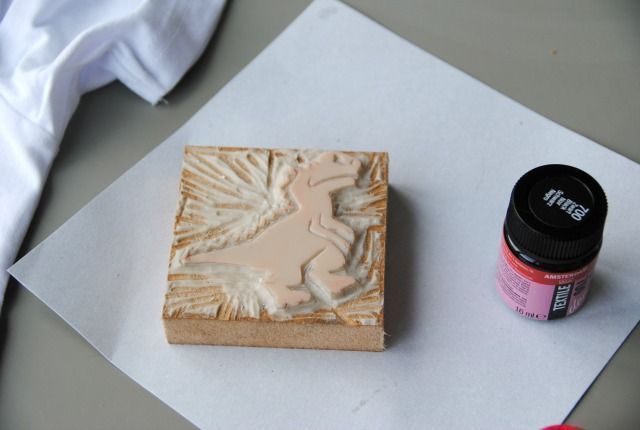
First of all, I googled. I wanted an image of a T-rex that wasn't too busy and that I could easily copy. It also didn't have to have too many lines and it had to be very graphic so that I could make a stamp out of it.
I found several black images and combined them. I drew the T-Rex on a piece of paper with the same dimensions as my stamping pad so that it would fit exactly.
I had found a set of gouges and stamp blocks on the internet. By the way, I saw yesterday that they also sell this at Hema. Ideal. I then drew the T-rex in mirror image on the stamp. Now the tinkering could begin.
With a small fine gouge I first cut out all the lines. Then I could remove the large parts on the outside. This was quite a job but it is quite a nice job.
In between I made a test print with a little poster paint to see if the stamp was gouged deep enough.
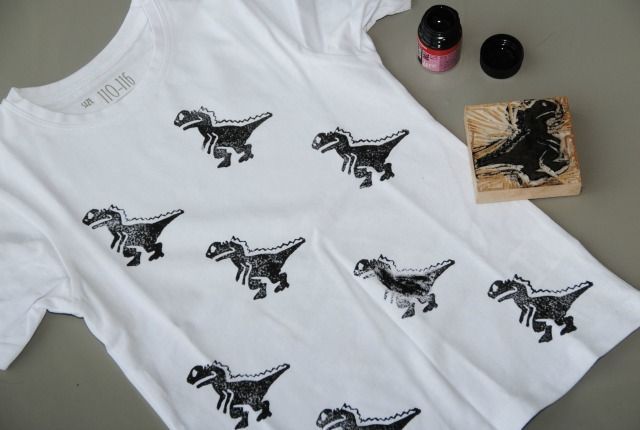
After updating the stamp I was finally able to get started. I made sure the shirt was on a flat surface and put a piece of cardboard between the two layers. This way you can be sure that the paint will not accidentally push through on the back.
With a sponge I carefully spread the fabric paint on the stamp. And so I made my first print. I really stamped the print a bit by eye.
I first had to let this textile paint dry for two hours, after which I ironed it on the back for 3 minutes. This way the print is fixed and can simply be washed up to 60 degrees. The little man is very happy with it. And me too of course! On to the next shirt.
I think I'm going to gouge a unicorn for the little girl.
Have you ever stamped a shirt? You can also do this very nicely with a potato or washing-up brush. Good luck!
♥ ♥ ♥ Affiliate links are used on Fulltime Mama. This means that if you click on one of the links, we may receive a small commission. It costs you nothing extra, but it does give us something. With these proceeds we can maintain this website.
We also sometimes get paid for an article or we get a product in exchange for a blog post. Our opinion therefore remains unchanged and honest. For more information you can read the disclaimer. ♥ ♥ ♥